Tuesday, May 26, 2009

Organza knot center Flower

This is a quick and simple card. The flower is a stamp by Technique Tuesday. I stamped it with black ink onto a mauve pink cardstock & cut out and shaped. I used the Martha Stewart "Anywhere Punch" to punch hole in the center. I layered 2 strips of organza ribbon and tied a knot in the center, then threaded the ends into the hole in the center of the flower. Then I added the small pink rhinestones to the stamen lines. The sentiment stamp is by INKADINKADO. I am not sure who the swirl stamps are made by-they are from a clear set.

Monday, May 25, 2009

Ribbon Loop Flower


I saw this idea a long time ago on Claire Brennan's blog "Waltzingmouse" She is so amazingly talented. She did a tutorial on these a long time ago & I finally got around to trying them. I did go out and but the slot punch tool thingie, because one can never have enough tool thinigies! And now I have even more reasons to hoard ribbon!!! The center of the flower is a button.
I hope you all have a wonder full Memorial Day! Thank you to all who have served our country! God Bless the USA!

Sunday, May 24, 2009

Apple punch flower

This is a pretty easy flower to make using the large apple punch. The centers are made from the small sun punch. The leaves are the grape leaf & fern,and there are 2 sizes of butterflies. All the punches are available from ScrappliyEverAfter
The border punch is from SU and I used Rose Romance to sponge the edges of the flower & butterflies.

Thursday, May 21, 2009

Posies in Gingham Pot

I can't seem to get enough of these flower pot pocket cards! I just love them and could make tons of different ones.... if I just had the time! The flowers are from the Retro flower punch, with a stamen punch used in the centers, the leaves are the ash leaf punch. I hope to have more soon!!

Wednesday, May 20, 2009

Cupcake Birthday

I figured you might be getting tired of sooooo many flower cards...:)-So here is something actually stamped!!!
My friend at work asked me to make a birthday card for her daughter, so it was perfect time to try out these $1.00 stamps from Michael's that I got about a month ago. I colored them with prismacolor pencils & blended with OMS. Then used stickles to make them sparkle!

Sunday, May 17, 2009

Paper Tiger Lillie's

I can't believe how busy it has been around here! This card is the only thing I have made in a whole week! It was made for a friend who spent her birthday (and mothers day) in the hospital. She has been in the hospital for about 3 months now & would appreciate your prayers. Patsy is such a talented artist, with everything from quilting, to painting, to card making.
These Lillie's are made exactly the same as the pink star gazer Lillie's, just shaded with orange & yellow pastels. If you look closely you will see they are accented with Flowersoft. I really like making these.


Tuesday, May 12, 2009

Paper Star Gazers


You may find it hard to believe that these Lillie's are made from paper-well cardstock to be exact! They are even prettier in person, but I got the best photos I could, before taking it over to the Scrapbook Haus in New Braunfels, Tx. This is the sample for the up-coming class that will be there on June 14th.


Friday, May 8, 2009

Sweet Lavendar Rose


I recently got some "out of date" or "old" wall paper sample books from Sherwin-Williams! I am so amazed at how beautifully they go together with scrapbooking papers. On this card the top panel is wall-paper, and the bottom panel is designer srapbooking paper by Cloud 9 design. The possibilities are endless, and the best part.....they were free!!!
This rose is colored with with Twinkling H20 colors "sweet lavender" and leaves are "heavenly bamboo" and "old olive". My approach is to make the flower first.... then pick papers to match. This may not be the best approach, but it's how I seem to work best.

Thursday, May 7, 2009

Vintage Rose

I know I have been making a lot of rose cards, but I needed more samples. This one is colored with Tattered Angels Glimmer Mist. They come in a lot of colors...I used Scarlet. I shook it well then sprayed it onto some wax paper, the color was a little darker than I wanted so I simply diluted it with water. Then painted the petals...you can sort of dip the petals into the "puddle" that is on the wax paper. Thanks to Susan at the Scrapbook Haus in New Braunfels, TX for suggesting that I try it. I didn't realize the Glimmer Mist had so much color, because the only one I had ever used was Iridescent Gold (which doesn't have a lot of color, just sparkles) This is a great alternative to the twinkling H20"s since they are going out of business, and will not be available in the future. The paper on this card is by "graphic 45" Baby 2Bride collection that I also got at the Scrapbook Haus in New Braunfels, Tx. I LOVE this paper!


Saturday, May 2, 2009

Recycled Spice Jar

(click to enlarge for detail)

This is my attempt at recycling. I took an empty spice container (mine happened to have been chili powder) removed the label with Goo-Gone and washed it thoroughly. I made sure there was no lingering odor! Then decorated it to become a candy gift container. It is a cute gift with matching card, and cost next to nothing! My friend Linda made the large croched flower/doily that is on the lid. The small croched flowers are from e-bay you can find them HERE I want to learn to crochet like that....in all my spare time...ha ha ! The cardstock is double sided & from Imaginisce. I distressed & sponged to give the vintage look.
I will be looking at jars & bottles ....and really everything for more ideas & ways to "re-use" & recycle. I would love to know how you like it & any other recycling ideas you have!

Tuesday, April 28, 2009

Fit for a Princess


This was a super quick card for my daughters birthday. The paper is from Bo Bunny & they have coordinating cardstock stickers that I used for the sentiment. I stuck the sticker to a scrap of cs, then cut it out & used pop dots to make it raised up off the card. There are flowers on the sticker,that I covered up with paper flowers. I added pink brads in the centers. Of course my daughter (who turned 21) could have probably cared less....except for the money that was inside the card... You can see my Princess singing by clicking HERE (she is really good)

Saturday, April 25, 2009

Life is a bowl of Cherries


I am going through a phase...I just love the "shabby chic" vintage look! I study the work of Melissa Phillips & think to myself....How does she do it? I wouldn't think to put those pps, ribbon, etc. together- Yet I love it! So I am trying to think outside the box. I realize that I am to "matchy matchy" Admitting it is the first step....right? But how do I break that cycle???
Anyway, I pulled the sewing machine out of the closet, dusted it off, and set it up on a TV tray (because I have NO room) and this card is what I wound up with. The stamp is from Art Impressions, the pprs are Paperpizzaz, and cosmo cricket. I used a scrap of fabric as a ribbon.
Please help with any advice on how to break the cycle of being to "matchy matchy" !

Monday, April 20, 2009

Frame of Flowers

I feel so fortunate to have gotten to go take some classes by Susan Tierney Cockburn, the Author of "The Paper Garden" & The Paper Bouquet" I was a two hour drive ( in the rain) both directions- but so worth it! This Floral Matt was one of the classes- I didn't finish in the class, but finally got it all put together today. The class was great, I learned to make several new flowers, bought some new punches, and met a new friend.
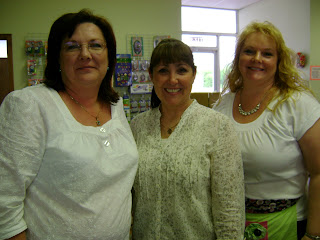
Sonya Appel from Appel Quilling and I had become blogging buddies, but we were able to actually meet in Temple, Tx for the classes. Here is a picture of Sonya, Susan, & me.

Wednesday, April 15, 2009

Old Fashioned Posie

Things have been so busy here lately! I am going quilt shop hopping tomorrow, then off to Temple, Tx on Friday to take classes on making flowers using punches (trust me there is still much to learn) Then I teach a class on Sunday in New Braunfels!


I really like these "lollipop" posies-they are so easy! I am very into the vintage look right now, so I hope yall aren't loosing interest. I defiantly go through phases in my crafting...do you? If you want instructions for this card let me know. I will be happy to share, but Im off to bed for tonight!

Monday, April 13, 2009

Vintage Rose


This time I punched the flower petals out of cardstock, then sponged with Antique linen Distress Ink. The I shaped the petals & assembled the rose. The Designer Papers are from
K& CO and Die cuts with a view. The swirl & rick rack are "element stickers" from Basic Grey.


Saturday, April 11, 2009

Happy Easter

I want to wish everyone a very Happy Easter! These are a couple of Easter cards I made a while back.

These stamps are from Verve, accented with pearls.


This stamp was from the $1.00 bin at Michael's

accented with very small pompoms for tails.

Wednesday, April 8, 2009

Antiqued Flower Pot

Ok- I saw all those cute flower pots at SCS and finally realized they were for the Technique Lovers Challenge.....then after searching for a while....found the instructions to make it! Remember I am blonde-LOL- I must have favorited 8 or 10 others because there were some Great ones! My flowers were punched out of cardstock, sponged with distress ink in Tea Dye then shaped & assembled. They are attached to the pull out tag that sits inside the flower pot. I just love this idea & thanks to who ever came up with it! Thanks to Stephanie Luman for sharing the instructions which you can find HERE
I will probably be making many more of these, in brighter colors, and with different flowers-because hello....I love flowers!
Here are the punches I used to create the flowers,the small sun is used in the center of all flowers.


Also I am honored by Sonya at Appel Quilling to receive an award! This blogging stuff it toooo fun. I get to make new friends, share ideas, and get awards! Life is Great! Thanks!!!!

Monday, April 6, 2009

Soft Pink Rose

I am sooo happy that I have been reconnected with an acquaintance from about 10 years ago. Yuki Zepeda & I sold SU way back when. I found her again, and she is now with The Angel Co. She has about 65 in her down line, and has socials at her home about once a month! I attended one Fri night & had a blast! She had stations where we could make different cards- I started this card there. The background papers are strips pieced together (from the Angel Co.) I was too busy takling, eating & having fun to finish anything, so I brought it home, & put a flower on it! The tag is a cuttlebug die & is stamped with a clear stamp from a Crafty Secrets set.
I think it turned out not too "shabby" & a little "chic"

Saturday, April 4, 2009

I love awards!

I just love awards...maybe because I never received any before I started blogging, but I just get so happy & giggly & walk on cloud 9 all day! Thanks to everyone for their encouragement!


A great big THANK YOU goes out to Becky at A Diamond in the Rough for giving me this award! It made my whole week! I am to pass it on to my top 10 Fav's ....so here it goes...but in no particular order!

Shannon's Seniments

Appel Quilling

Paper Possibilities

Mainly Flowers

This is My Story

Planted in Joy

Papers Pads, and Pictures

Schwooo!

Whirlpool of Imagination

Pure Flow Studios


Thursday, April 2, 2009

Shabby Chic???

During my blog surfing I have found some great, and I mean great talent that I have been sooo inspired by. I absolutely LOVE the "Shabby Chic" look...but creating it doesn't come so easily for me. If you like the Vintage/Shabby Chic look I highly recommend these 2 blogs!
Lilybean's Paperie and bibbis dillerier
This is my first attempt to create the "shabby-chic" look...and I am not totally happy with it....but we all start somewhere...right?


Please share any shabby chic tips you might know.....I would love to have your comments!